How to Create a New Kharty: Step-by-Step Guide for Teachers
Creating a Kharty (interactive diagram) from the web is a straightforward three-step process. This guide walks teachers through the full flow, with real screenshots, so you can publish your first diagram in minutes. (The screenshots show the Spanish interface; the English one is identical.)
Prerequisites
You need a Kharty account and to be signed in at kharty.com. A free account lets you create up to 3 Khartys; with Kharty+ or PRO you can create as many as you like.
Step 1 — Open the creator
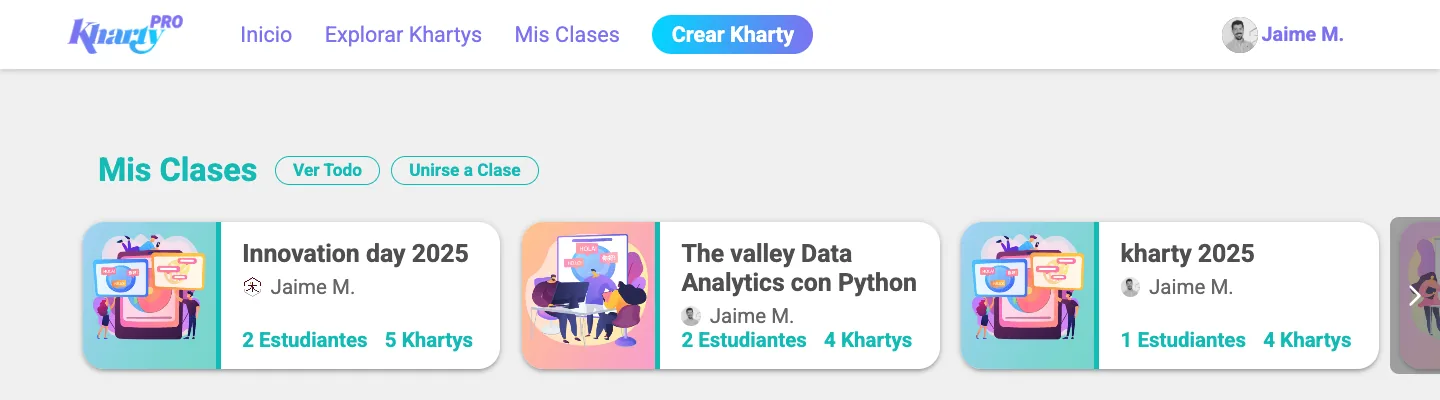
From your main dashboard, click the "Create Kharty" button in the top navigation bar.
Step 2 — Choose how to create it
Kharty asks "How Do You Want to Create It?":
- Create Manually: use an image you already have and place the terms on it. This is the flow this guide covers.
- Create with AI: describe what you want to study and Kharty draws the image and places the terms for you. We cover it in How to Create a Kharty with AI.
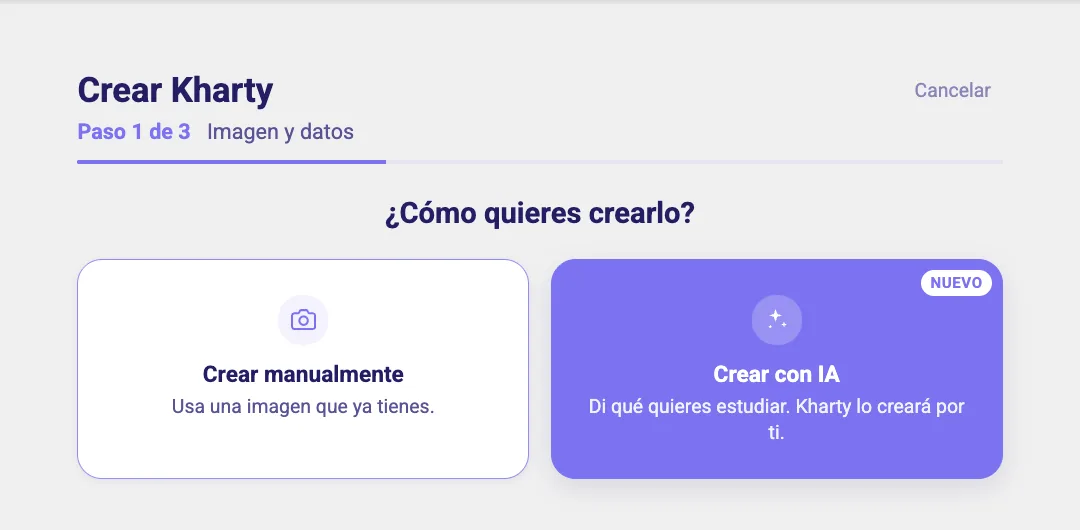
Choose Create Manually.
Step 3 — Image and details (Step 1 of 3)
Fill in the fields:
- Image: drag an image into the left area or click to browse. The image is the foundation of your Kharty — terms will be placed on top of it.
- Name (required): the title of the Kharty, e.g. "Free-time activities".
- Description (optional): free text to describe the content.
- Category (required): choose from Geography, Anatomy, Science, Languages, Street Maps, Engineering, or Others.
- Language (required): language of the terms.
- Keywords (optional): tags to help others find your Kharty.
- Teach terms in order (optional): enable this to present terms in a fixed sequence.
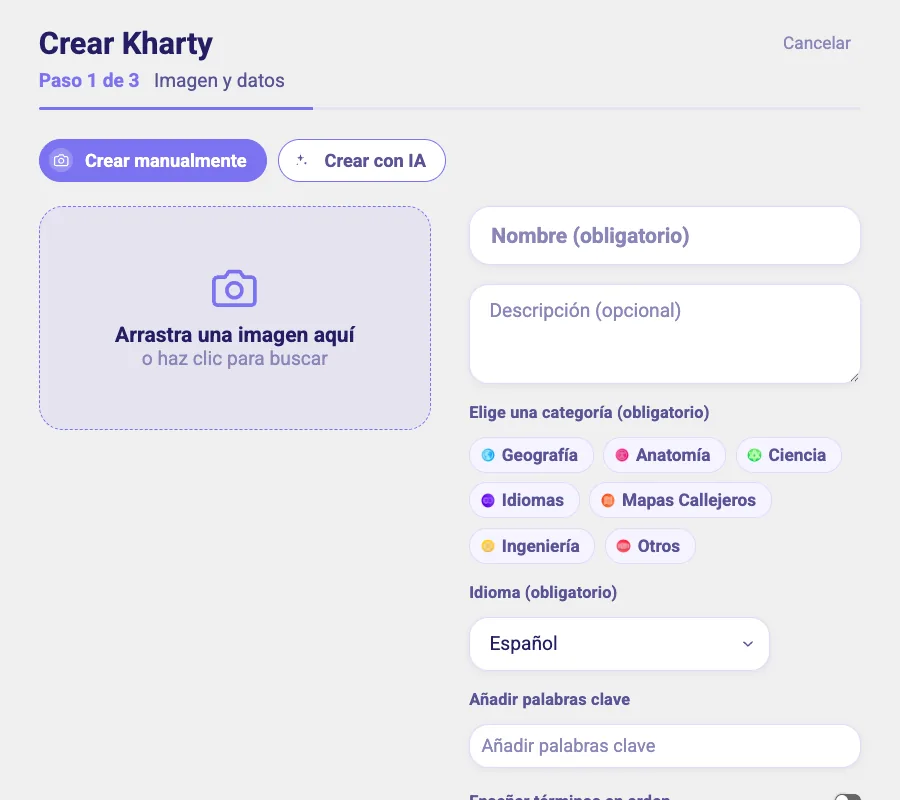
Once all required fields are filled, click "Continue".
Step 4 — Place the terms (Step 2 of 3)
You will see your image with terms overlaid. You have two options:
Option A — Magic wand (Auto-Detect Terms): Kharty analyses the image and automatically detects any text already written on it. This is the fastest option when your image contains visible labels.
Option B — Manual adjustment: use "+ Term" to add terms and "Cover" to hide text on the image. Click any term to rename it, move it or delete it.
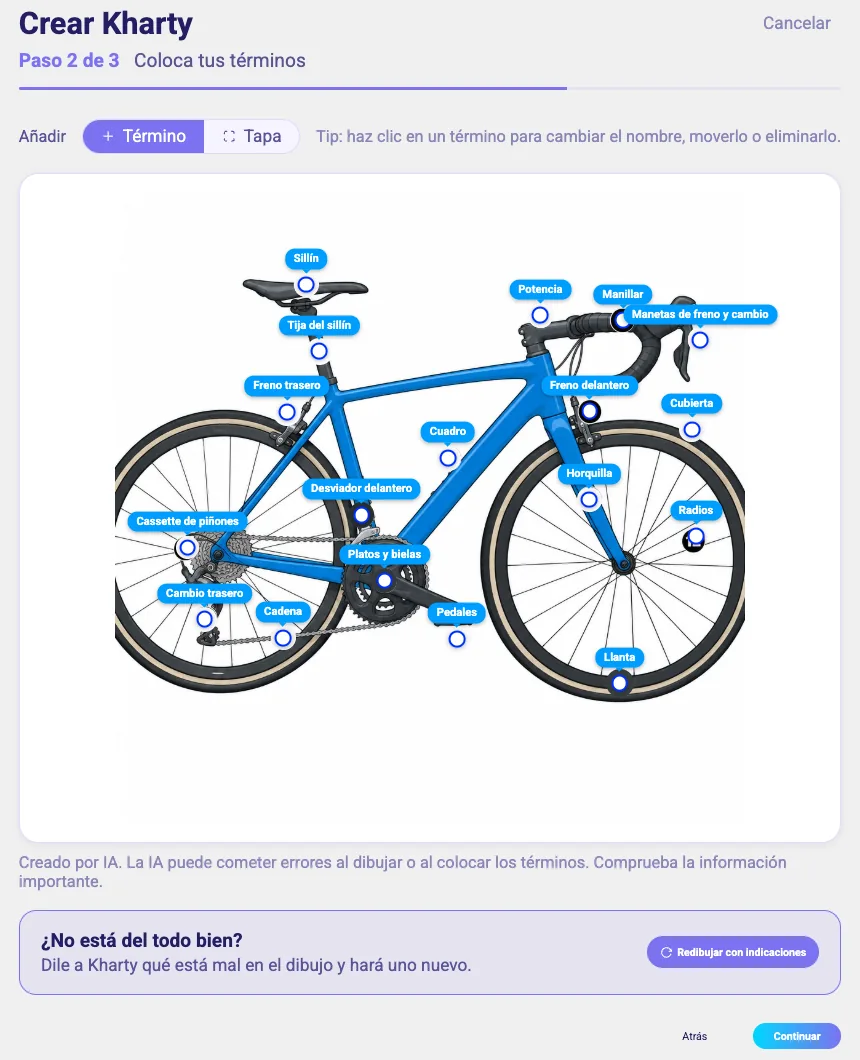
Once your terms are correctly placed, click "Continue".
Step 5 — Review and publish (Step 3 of 3)
On the final screen:
- Review terms: the full list is displayed. Edit (pencil icon) or delete (bin icon) any term.
- Visibility: toggle "Publish to Gallery" to make the Kharty discoverable and playable by anyone on the platform. Leave it off to keep it private.
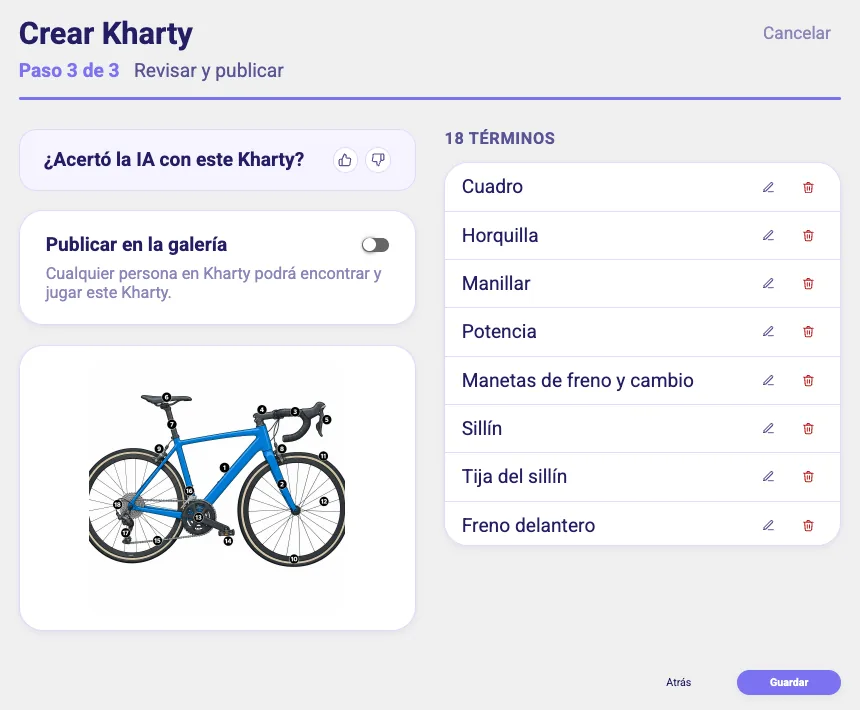
Click "Save" to publish.
Result
Your Kharty will appear in the "My Creations" section of your dashboard, ready to share with your students.
No image to hand? Create your game with AI: describe it and Kharty draws it for you, with every term labelled and ready to study. Here's how: How to Create a Kharty with AI.